

The most satisfying home upgrades are not renovations: they are small, reversible changes — a repainted wall, swapped handles, better light — that one weekend can finish and one decision can undo. The upgrading tips decoradhouse in this guide stay at that scale, measured before buying and finished before Monday.
Key Takeaways
- A weekend upgrade passes four tests: it is reversible, it needs no permit, it fits basic tools, and it can be finished — not just started — inside two days.
- Paint is the highest-change upgrade per hour, but only when the preparation is treated as the job rather than as a delay before it.
- Hardware and fixture swaps refresh a room out of proportion to their cost, because hands and eyes meet them many times a day.
- Lighting upgrades are measurement upgrades: room size and task decide the output you need before style decides the fitting you want.
- Sequence the weekend so the upgrade ends finished — drying times, curing times and a written last step are what separate an upgrade from an ongoing project.
What Makes an Upgrade a Weekend Upgrade?
Scale is a definition before it is a budget, and a weekend upgrade earns its name by passing four tests at once. It must be reversible, meaning a future owner — or a future you with different taste — can return the room to its previous state with ordinary effort. It must sit below the permit line, touching no structure, no gas, no new electrical circuits and no plumbing beyond the fixtures already there. It must fit the tools a household plausibly owns or can borrow for two days. And it must be finishable, which is the test most upgrades quietly fail: a job that ends Sunday night at ninety percent is not a weekend upgrade but the first chapter of a renovation.
The upgrading tips decoradhouse collected here all pass those four tests, and the boundary matters as much as the list. Whole-room renovation planning, staged budgets, permits and work orders belong to a different discipline — the one that answers questions in writing before any wall is opened — and mixing the two scales in a single weekend is how small projects acquire structural surprises. A weekend upgrade should be chosen precisely because it cannot ambush you: its worst realistic outcome is a colour you repaint, not a discovery you must fund.
Cost behaves differently at this scale, too. A weekend upgrade’s money sits almost entirely in materials you can return, exchange or repaint, rather than in labour booked by the day, so a mistake costs an afternoon and a receipt rather than a variation order. That is the honest promise of the category, and it is why the upgrades below are ordered by change-per-hour rather than by price: at weekend scale, your scarcest resource is not money but the two days themselves.
Which Paint Upgrades Give the Most Change per Hour?
Paint changes more of a room per hour than anything else you can buy in a tin, because walls are the largest surface the eye reads and colour is the first property it registers. A single wall repainted in a deeper shade reorganises how every object in front of it is judged; a ceiling returned to a clean, flat white quietly raises the room’s apparent height and light; and a door, a radiator or a run of tired woodwork repainted in a contrasting finish can make the surrounding walls look newly done without touching them. The upgrading tips decoradhouse that involve paint are therefore chosen for surface area or for contrast, never for novelty alone.
Preparation is the job, and the painting is merely its final hour. Sugar-soap washing, filling, sanding and masking are the unphotogenic stages that decide whether the finish looks like an upgrade or like a coat of regret, and they consume the majority of a well-run weekend. Paint over grease and the new coat will announce the old kitchen; skip the filler and every lamp in the room will find the dents for you after dark. Buy the paint after measuring the wall — length multiplied by height, minus honest deductions for doors and windows — and after testing the colour on a board in the room’s real light, because a weekend is too short to spend twice on the same wall.
Respect the chemistry’s timetable as part of the plan. Coats need their stated drying intervals, and a second coat laid too early drags the first into a texture no sanding fully forgives, while furniture pushed back against a wall that has dried but not cured will leave its signature in the finish for years. Build the drying gaps into the weekend’s shape — paint in the morning, hardware after lunch, the room reassembled the following evening — and the upgrade ends cured, clean and genuinely finished rather than merely dry to the touch.
| Upgrade | Typical time once prepared | What to measure before buying | Reversal cost if taste changes |
|---|---|---|---|
| One feature wall repainted | Half a day including two coats | Wall length and height; test board in morning and evening light | One tin and half a day |
| Kitchen cabinet doors repainted | One full day with drying gaps | Door count and total door area; hinge type if handles move too | Repaint again; handles return to original holes if sizes kept |
| Handles and knobs swapped throughout a room | One to two hours | Screw spacing on every existing handle, centre to centre | Minutes — keep the old set in a labelled bag |
| Light fittings and bulbs upgraded | Half a day | Room area, ceiling height and the output the room’s tasks need | Refitting the old fitting; keep its screws with it |
| Front door repainted and hardware polished | One day, weather permitting | Door area; letterbox and handle positions if replacing | Repaint; original hardware refits the same holes |
| Sealant renewed around bath and basin | One to two hours plus curing | Length of every run to be replaced; tube coverage against that total | Fresh sealant can be cut out and redone in an hour |
How Do Hardware and Fixture Swaps Refresh a Room Without Renovation?
Hardware is the part of a room your hands audit every day, which is why changing it registers so far beyond its size. A kitchen whose cabinet handles change from dated to deliberate, a bathroom whose taps stop looking tired, a door whose handle no longer wobbles through its loose rose — each swap is small, and each is encountered dozens of times a week, so the refresh compounds in a way that a prettier cushion never will. The work itself is the gentlest in this article: most swaps are screws, patience and the discipline of changing one item fully before starting the next.
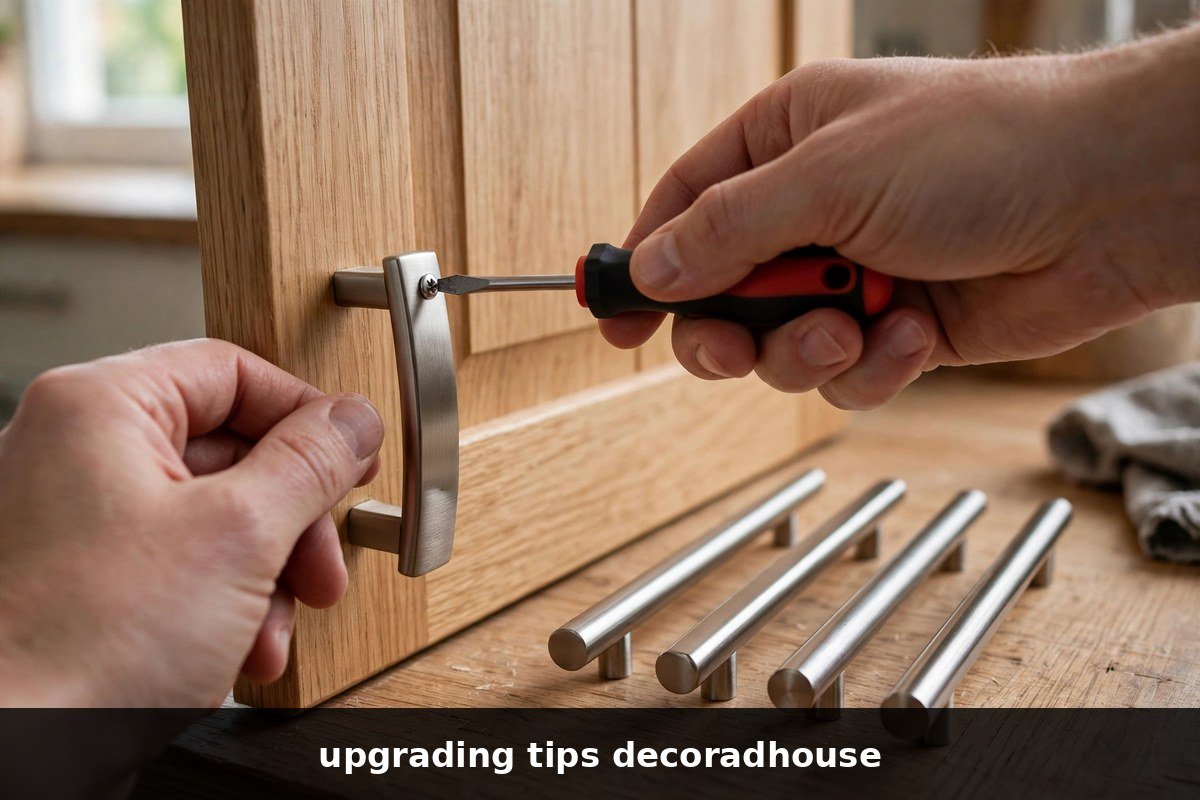
Measurement is the whole secret, because hardware is sold in standards that look identical and differ by millimetres. Handle and pull sizes are given by the distance between their screw centres, and that single number — measured centre to centre on the existing fitting before you order — decides whether the new set glides onto the old holes or demands drilling, filling and a noticeably longer weekend. Count before you buy as well: cabinets hide handles in quantities that surprise everyone, and a set that covers eleven of twelve doors is a room that stays unfinished until the second delivery arrives.
Keep the old set. Bag it, label it with the room and the date, and store it somewhere findable, because reversibility is only real while the original parts still exist. The same discipline applies to light fittings, taps and curtain hardware: the upgrade stays a weekend upgrade precisely because the way back is preserved in a labelled bag rather than in a skip. Renters live by this rule out of necessity, but owners benefit from it just as much the first time a fashion changes or a sale requires the room to look neutral again.
What Should You Measure Before Swapping Lighting?
Lighting is the upgrade most often bought by appearance and most often regretted by output, so measure the room before admiring the fitting. What a room needs from its light depends on its floor area, its ceiling height and the tasks performed in it: a kitchen bench where knives work needs a different quantity and direction of light from a bedroom corner where books are read, and a fitting that is beautiful at the wrong output is simply a prettier way to strain your eyes. Run the room’s dimensions through the Room Lighting Calculator first, so the fitting you fall for is chosen from the shortlist of fittings that can actually do the room’s job.

Bulbs are the cheaper half of the same upgrade and often the larger half of its effect. Colour temperature decides whether a carefully chosen paint colour reads as itself after dark — warm bulbs amber a cool grey, daylight bulbs bleach a warm cream — and swapping an inconsistent set of leftover bulbs for one matched set, at one temperature, in one room, can make the whole space feel newly decorated for the price of a pizza. Dimming belongs to the same conversation: a dimmer-compatible bulb set and a dimmer that suits it turn one ceiling light into several rooms’ worth of moods, and the compatibility check takes minutes at the shelf rather than an electrician later — provided the work stays at the level of bulbs and fittings on existing circuits, which is where weekend work must end.
Layer the result rather than merely brightening it. A single central fitting, however powerful, flattens texture and pools shadow exactly where faces and tasks are, while the same room with a general source, a task light where work happens and one low accent source gains depth that visitors describe as atmosphere without knowing its cause. Weekend upgrades can achieve the layering with plug-in lamps and swapped shades rather than new wiring, which keeps the job reversible and permit-free while delivering most of what a rewired scheme would.
How Do You Sequence a Weekend So the Upgrade Actually Finishes?
Finishability is a schedule, not a hope, and it is written before the first tin is opened. List the upgrade’s stages in their forced order — preparation, the wet or messy work, drying and curing gaps, reassembly, and the small final task everyone forgets, such as refitting the curtains or rehanging the pictures — and then read the list backwards from Sunday evening. Any stage whose drying time crosses the weekend’s end is a warning that the job’s true size is larger than its name, and the honest responses are to shrink the scope or to move the job to a longer weekend rather than to compress the chemistry.
Protect the room around the work with the same seriousness as the work itself. Dust sheets taped at their edges, hardware and screws kept in labelled bowls rather than pockets, paint decanted into a small tray rather than carried as an open tin — these are not fussiness but the difference between an upgrade and an upgrade plus a damaged carpet. Stop work at the planned point each day, clean brushes properly rather than soaking them in hope, and leave the room usable overnight; a household that can still eat, sit and sleep normally is a household that will finish the job cheerfully on day two.
| Weekend stage | When it belongs | What actually happens in it |
|---|---|---|
| Preparation | Saturday, first | Washing, filling, sanding, masking, measuring and counting — the stage that decides the finish |
| Wet and messy work | Saturday, after preparation | Painting, sealant removal and renewal, any job whose smell or dust must clear overnight |
| Drying and curing gaps | Between stages, non-negotiable | Coats rest for their stated intervals; the gaps are filled with dry jobs like hardware swaps |
| Reassembly | Sunday, later | Furniture returns against cured surfaces; curtains, pictures and lamps go back in their order |
| The audit | Sunday, last | Daylight and lamplight walk-through, every drawer and switch operated, leftovers labelled into storage |
End with the audit that separates finished from nearly. Walk the room in daylight and again under its lamps, because each light exposes different sins; run a hand over painted edges and newly fitted handles; operate every drawer, door and switch the upgrade touched; and write the leftovers — the half-tin of paint with its colour name and batch, the spare handles, the old fittings in their labelled bag — into storage where they can be found. The upgrading tips decoradhouse in this guide all share that closing ritual, because an upgrade is only an upgrade when the room, the tools and the evidence are all put back in order.
The Limits of Weekend Upgrades
Reversibility has a hard edge, and honest upgrading names it. The moment an upgrade touches structure, gas, a new electrical circuit, or water supply pipework rather than the fixtures on its ends, it has left the weekend category entirely and entered the territory of licensed professionals, permits and written renovation plans — and no confidence gained from easy handle swaps transfers across that line. Similarly, an upgrade that uncovers a genuine problem — damp behind the wardrobe you moved, a cracked tile bed under the sealant you cut out — has stopped being an upgrade and become a discovery, and discoveries are handled by diagnosis and budget, not by painting over them and finishing the weekend on schedule.
Surfaces also keep their own counsel. Paint cannot level a wall, new handles cannot square a warped door, and brighter light is famously unkind to finishes that were acceptable in the dim — several of the upgrades above will honestly reveal flaws they did not create. That revelation is information, not failure, but it means the weekend budget should hold a small reserve for the filler, the hinge and the replacement shade that the first coat of paint or the new lamp suddenly makes necessary.
Finally, weekend upgrades improve rooms; they do not revalue houses, and their economics should be judged in use rather than in resale arithmetic. A repainted hall earns its keep every time you come home, not on the day you sell, and an upgrade chosen to please an imaginary buyer usually pleases nobody at all. Choose the changes your household will actually touch, see and enjoy weekly, and the small reversible scale of these projects becomes their virtue rather than their apology.
Frequently Asked Questions
How do I know whether a job is a weekend upgrade or a renovation?
Test it against four questions: can it be reversed with ordinary effort, does it avoid structure, gas, new circuits and supply pipework, can it be done with household tools, and can it be finished — including drying and curing — inside two days? Four yeses make it a weekend upgrade; any no moves it into renovation territory, where written scope, budget and professionals belong, and where squeezing it into a weekend is how small projects acquire expensive surprises.
What should I measure before ordering new handles or knobs?
The distance between the screw centres of the existing handles, measured centre to centre in millimetres, because that single figure decides whether the new set uses the old holes or demands drilling and filling. Count every handle in the room as well — cabinets hide them in surprising quantities — and photograph one existing fitting beside a ruler before ordering, so the replacement’s proportions are judged against evidence rather than memory.
How much light does a room actually need before I buy a fitting?
Calculate it from the room rather than guessing at the shelf: floor area, ceiling height and the tasks the room hosts decide the output required, with task areas such as kitchen benches and desks needing more, delivered closer, than ambient corners. Running the dimensions through a room lighting calculator gives you a target figure first, and only then should style shortlist the fittings — a beautiful fitting at the wrong output is a prettier way to strain your eyes.
What is the most common reason a weekend upgrade fails to finish?
Drying and curing times that were never written into the plan. The work itself usually fits the weekend comfortably; what overflows is the chemistry — a second coat laid too early and dragged, furniture returned against paint that was dry but not cured, sealant used before its curing hours had passed. Reading the schedule backwards from Sunday evening, with every drying gap drawn in, exposes the problem while it is still free to solve by shrinking scope.
Should I keep the old handles, taps and fittings I remove?
Yes — bag them, label them with the room and the date, and store them somewhere findable. Reversibility is the defining virtue of a weekend upgrade, and it only exists while the original parts do: fashions change, houses get sold, rooms get returned to neutral, and the labelled bag in the cupboard is what makes all of those cheap. The same applies to leftover paint, whose colour name and batch number should be written on the tin before it is shelved.
Conclusion
Reduced to a rule you can hold against any Saturday-morning idea, upgrading tips decoradhouse ask four questions of every project — reversible, permit-free, household tools, genuinely finishable — and then ask for a tape measure before they ask for a wallet. Pass those tests and a weekend is enough to change how a room looks, feels and works under your hands, with the way back preserved in a labelled bag. For more home improvement advice you can measure, visit smart decoratoradvice.