

A patio renovation succeeds or fails below the surface: get the base, the drainage and the layout right and the finish will last for decades. The how to renovate my patio decoradhouse steps here run in outdoor work order, from lifting the old surface to the final jointing sand.
Key Takeaways
- A patio is a structure, not a rug: the visible surface is only the top of a layered build whose base decides how long it stays level.
- Drainage comes before decoration — the surface must shed water away from the house at a steady fall, or every other improvement sits in a puddle.
- Choose the surface by how the space will actually be used and maintained, not by the photograph that inspired the project.
- Lay out zones on paper and then in string lines on the ground before anything is lifted; moving a dining area costs nothing at that stage.
- Work in outdoor order — strip, excavate, drain, base, edges, surface, joints — because each layer is the foundation the next one stands on.
Where Does a Patio Renovation Actually Begin?
It begins with an honest survey of what is already there, because most patio failures are inherited rather than created. Walk the existing surface after rain if you can and note where water stands, where slabs rock or have sunk, where the surface meets the house wall and whether that junction sits safely below the damp-proof course. A patio that ponds against the wall or has crept up toward the threshold over the years is telling you its real problem, and resurfacing over that problem simply gives it a more expensive coat.
Look below as well as across. Lift one slab or paver at the edge and see what the surface was laid on: a proper compacted sub-base, a skim of sand over soil, or — in the saddest and commonest case — the slabs dotted onto blobs of mortar over bare earth. The answer decides the whole scope of the project, because a sound existing base can sometimes be repaired and reused, while a failed one means the renovation is really a rebuild, and budgeting it as a resurface guarantees the argument that follows.
Measure the space properly at this stage, in the garden, with its fences, steps, drains and out-of-square corners honestly included. The how to renovate my patio decoradhouse method in this guide hangs every later decision — quantities, falls, zone sizes — on those real dimensions, and a patio planned from an estate agent’s floorplan or a hopeful guess will be wrong in all three. Note also what runs beneath: shallow services, tree roots pushing toward the surface, and the manholes and inspection covers that must stay accessible whatever is laid over them.
How Do You Get Drainage and Slope Right?
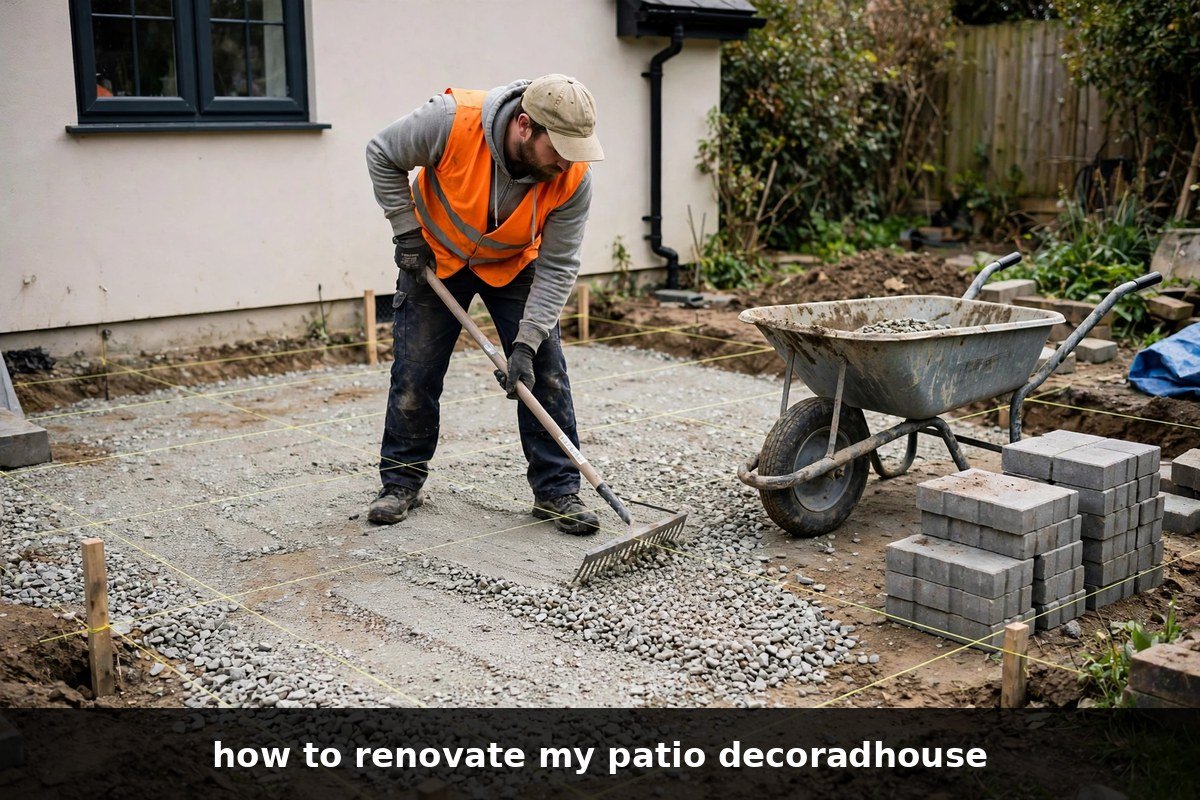
A patio must fall. Water that lands on it has to travel somewhere, and the only acceptable destination is away from the house — toward a lawn, a planted border, a drainage channel or a soakaway — never toward the walls, where it will saturate the masonry, stain the render and eventually find the interior. The fall is gentle but non-negotiable: a steady slope of roughly one unit down for every sixty to eighty units across, built into the base layers rather than faked in the surface, so the finished patio sheds water without looking or feeling like a ramp.
Build the fall in from the excavation, not at the laying stage. The sub-base is graded to the slope, checked with a long level and a string line, and only then is the surface laid following it — because a surface laid flat on a sloped base varies in thickness, and a surface sloped over a flat base hides puddle-shaped lies in its bedding. Where the patio is large or enclosed, plan the drainage hardware at the same time: a channel drain along the house wall or across the low edge, connected to a proper outlet, is what separates a patio that copes with a storm from one that becomes a shallow lake against the back door.
Above everything else, get the junction with the house right. The finished surface should sit comfortably below the damp-proof course and below any air bricks, with the fall carrying water away from that line; a renovation that raises the patio toward the house for the sake of a level step is trading a convenience for a damp problem, and damp always collects its debt with interest. Where levels genuinely cannot work — a high threshold, a low garden — the honest answers are a drainage channel at the wall and a step, not a surface tilted toward the bricks.
Which Surface Should You Choose — Pavers, Poured Concrete or Slabs?
Choose by use and by maintenance honestly admitted, because each surface is a different bargain. Concrete pavers are modular and forgiving: individual units can be lifted for repairs or services, the laying is achievable by a careful householder, and the failure mode is local — one rocking paver, re-bedded in an hour. Large-format slabs give the calm, architectural look most renovations are chasing, but they are heavy, unforgiving of base errors, and they telegraph every millimetre of settlement as a lipped edge waiting for a toe. Poured or stamped concrete is one continuous surface with no joints to weed, and its failure mode is the opposite of the paver’s: a crack or a heave is a structural event in the whole panel, repaired visibly or not at all.
Quantities are where the choice becomes money, and they should be calculated from the real measured area rather than rounded at the merchant’s counter. Run the patio’s true dimensions through the Paver Calculator and the same discipline applies whichever surface you choose: it returns the count with a stated cutting allowance, which replaces the traditional pile of surplus units that were bought generously, cut badly and never returnable. Order the stated allowance, keep a small reserve of the same batch against future damage, and agree returns terms for unopened packs before delivery day.
| Surface | What laying it really involves | Maintenance it will honestly ask for | Where it suits best |
|---|---|---|---|
| Concrete pavers | Bedding course over compacted sub-base; units laid, cut at edges, jointed with kiln-dried sand | Re-sanding joints as they empty; lifting and re-bedding the occasional settled unit | Family patios, DIY builds, anywhere future access under the surface is likely |
| Large-format slabs | Precise full mortar bed over a rigid base; heavy units placed once and correctly | Pointing kept sound; any settlement shows immediately and needs professional relaying | Formal, design-led spaces where the base can be built to a high standard |
| Poured or stamped concrete | Formwork, reinforcement, one continuous pour, pattern stamped before it cures | Sealing on a cycle; cracks repaired as surface patches that stay visible | Large unbroken areas with no services beneath and a taste for a joint-free finish |
| Natural stone setts | Individual units bedded and jointed by hand, the slowest laying of all | Joint care as with pavers; the stone itself outlasts everything around it | Period houses and heavy-use entrances where longevity outweighs labour cost |
Admit the maintenance before choosing, not after. A household that will never re-sand a joint should not choose pavers; a household that cannot face a visible crack repair should not choose a poured slab. The surface that suits the garden you actually keep is the one that still looks right in year five.
How Should the Patio Be Laid Out Into Zones?

Divide the patio by the activities it must hold, and size each zone by its furniture rather than by the leftover shape of the garden. A dining zone needs the table, the chairs pushed back, and a walking margin behind them — measure that arrangement in a room indoors if you doubt it, because a dining area drawn two chairs too small will be discovered at the first meal and resented at every one after. A lounging zone needs less depth but more shelter; a through-route from the house door to the garden needs to stay clear, straight and wide enough for a wheelbarrow, because a patio that forces every garden job across the dining area has failed as a plan however it photographs.
Mark the zones physically before any construction: string lines and pegs on the actual ground, furniture carried out and placed inside them, and a day or two of living with the arrangement. Zones move free of charge at the string stage and at ruinous cost at the slab stage, and the string version reveals what drawings hide — the zone that sits in a wind tunnel, the corner that never sees sun, the dining spot directly under the gutter’s drip line.
Shade and edges are layout decisions, not finishing touches. Shade belongs over the zone used at midday — a pergola, a sail or a tree placed to cover the dining area in the hot hours while leaving the lounging corner to the evening sun — and it must be planned now because its posts need footings in the base layer, not holes drilled through a finished surface. Edges deserve the same forethought: a soldier course of pavers, a stone kerb or a steel edge is what the surface pushes against and what the lawn mower meets, and a patio without a designed edge unravels literally as well as visually, one creeping unit at a time.
What Is the Right Order of Work Outdoors?
Outdoor work has one honest sequence, and it follows the layers from the ground up. Strip the old surface and whatever failed beneath it; excavate to a depth that fits the full build — sub-base, bedding and surface — below the finished level you have planned against the house; install the drainage while the ground is open, because it will never be cheaper to reach; then spread and compact the sub-base in layers, graded to the fall, until it rings solid underfoot rather than thudding.
Edge restraints go in before the surface, on a haunch of concrete where the design demands it, because they are the frame the field of the patio is laid against. Then the bedding course, screeded to the fall and not walked on; then the surface itself, laid from the house outward or from the fixed edge inward, cut at the borders rather than in the middle of the field; then jointing — sand brushed and compacted into paver joints, mortar pointed between slabs — and finally the sealing, if the chosen surface wants it, left until the work has cured and dried honestly rather than sealed over construction moisture.
| Stage | What happens in it | What must be true before the next stage |
|---|---|---|
| Strip and excavate | Old surface and failed base removed; ground dug to full build depth | Formation level correct against the house, and soft spots dug out and filled |
| Drainage | Channels, outlets and soakaway installed while the ground is open | Water poured at the top demonstrably leaves by the intended route |
| Sub-base | Aggregate spread in layers, compacted, graded to the design fall | Base solid underfoot, fall checked by string line in both directions |
| Edges and footings | Restraints haunched in; pergola and shade footings placed | Edges cured and immovable; footing positions match the layout plan |
| Surface | Bedding screeded; pavers, slabs or pour laid and cut at borders | Surface following the fall, no rocking units, thresholds respected |
| Jointing and finishing | Joints sanded or pointed; surface cleaned; sealing if specified | Joints full after compaction and a second pass of sand or pointing |
Two scheduling truths govern the whole sequence. The first is weather: bedding, mortar and concrete all cure badly in frost and wash out in heavy rain, so the surface stages belong in a settled forecast rather than a hoped-for one. The second is access: every later stage crosses the earlier ones, so the route for materials must be planned to arrive over finished ground as rarely as possible — a wheelbarrow track across a fresh screed undoes in one pass what a morning built.
The Limits of a Patio Renovation
Some patios should not be renovated in place at all. A surface sitting over made-up ground that is still settling, over a failing retaining edge, or within the root zone of a tree that will keep growing will defeat any base you can reasonably build — the honest project in those cases is the retaining work, the root management or the relocation of the patio itself, and dressing the surface anyway is money spent rehearsing the same failure. A renovation guide that cannot say “not here” is selling, not advising.
Levels impose a harder limit. Where the garden falls toward the house, or the interior floor sits barely above the existing patio, the drainage geometry may simply not exist within the space available — and the correct scope then includes regrading the garden or accepting a channel-drained design, at a cost that belongs in the decision before the first slab is lifted. Similarly, patios over shallow services, septic systems or soakaways carry an access limit that no surface choice can design away: anything laid there must be liftable, which quietly rules the poured panel out.
Finally, a renovation cannot outrun its permissions and its neighbours. Rules on paving over front gardens and on drainage into public sewers vary by place and have tightened in many, and a party-wall or boundary question raised mid-build is far more expensive than the same question asked at the survey stage. The limits section of any honest patio plan is written before the work, in the calm, where it can still change the design.
Frequently Asked Questions
How deep should the base under a patio be?
For a pedestrian patio, the build below the surface commonly totals around 150 millimetres or more once the sub-base, bedding and the surface unit itself are counted — with the compacted sub-base forming the thickest layer of it. Ground that is soft, newly filled or clay-heavy needs more, and any surface that vehicles will cross needs a substantially deeper and stronger build. The correct depth is the one your soil and your traffic demand, which is why the survey digs a trial hole rather than trusting a number.
Can I lay a new patio surface over the old one?
Sometimes — when the existing surface proves sound and well-bedded rather than rocking or hollow, when the finished level will still sit safely below the damp-proof course and thresholds, and when the fall already carries rain away from the walls. Failing any one of the three means the old surface comes up. Overlaying is a legitimate shortcut on a good base and an expensive disguise on a bad one.
How much fall does a patio need away from the house?
A gentle, steady fall — in the region of one in sixty to one in eighty — is the usual target: enough that water visibly travels toward the drainage in rain, not so much that furniture feels the slope or the surface reads as a ramp. The fall must be continuous, without flat spots that pond, and it must run away from the building along the whole wall line rather than merely in most places.
When is the best season to renovate a patio?
The drier, milder months, when excavation is workable, mortar and concrete cure reliably, and bedding stays where it is screeded. Deep winter risks frost in fresh mortar and a site turned to mud; the height of summer can cure concrete too fast and makes heavy laying punishing. Shoulder seasons are the patio builder’s friend, provided the forecast for the surface days is settled rather than merely hopeful.
Do I need permission to renovate a patio?
It depends on where you live and what exactly changes. Replacing a back-garden patio like for like is unregulated in many places, while paving front gardens, altering drainage into public systems, building near boundaries or working on listed and protected properties can all require approval. The rules are local and change over time, so check your own authority’s current guidance at the survey stage — a permission question costs a phone call before the work and a great deal more after it.
Conclusion
Taken together, how to renovate my patio decoradhouse describes one discipline from the ground up: survey what exists, give the water somewhere to go, choose the surface by use and maintenance, lay out zones before lifting a slab, and build the layers in their only honest order. A patio renovated that way stays level, dry and useful for decades, because none of its success was left to the top layer alone. For home improvement advice you can measure before you spend, visit smart decoratoradvice.